How to Identify Quillworts
Identification of quillworts is notoriously difficult -- the few distinguishing characteristics are mostly invisible to the naked eye. Here are the recommended steps for successful collection and identification of your specimens. A review of morphology and terms is available here.
1. Location
Finding these furtive plants is half the battle. Aboveground individuals are morphologically nondescript, with just a whorl of simple, linear leaves. To complicate searching, quillworts often co-occur with with rushes (Juncus spp.), onions (Allium spp.), spikerushes (Eleocharis spp.), and other graminoids. But with practice it is possible to quickly tell Isoetes from these lookalikes.
From above, quillworts display of whorl leaves emerging from under the ground, without branching at all. Youngest leaves are produced in the center of the whorl, pushing the longer, larger, older sporophylls outward in a circle. Quillworts make no reproductive structure aboveground, so the leaves are all you ever see. This helps separate them from grasses, rushes, and sedges that will often branch, produce flowers/fruits aboveground, or produce leaves in a non-circular pattern.
Unlike leaves of many grass-like plants, quillwort leaves are 3 dimensional. Rolling a leaf between your fingers is a quick way to tell if you found a quillwort. In cross section, it will feel not quite round (sub-terete to hemispheric). The top side of the leaf will feel flatter than the bottom. Inside the leaf are 4 air channels running the length of the leaf, separated by a thin cross-shaped diaphragm visible in cross section. Along the leaf's length, there are also diaphragms crossing perpendicular to the leaf, visible from the exterior as pale striations.
If your suspect plant has these not quite round, striate leaves emerging from the ground in a whorl, you're ready to confirm it is a quillwort with the next step!
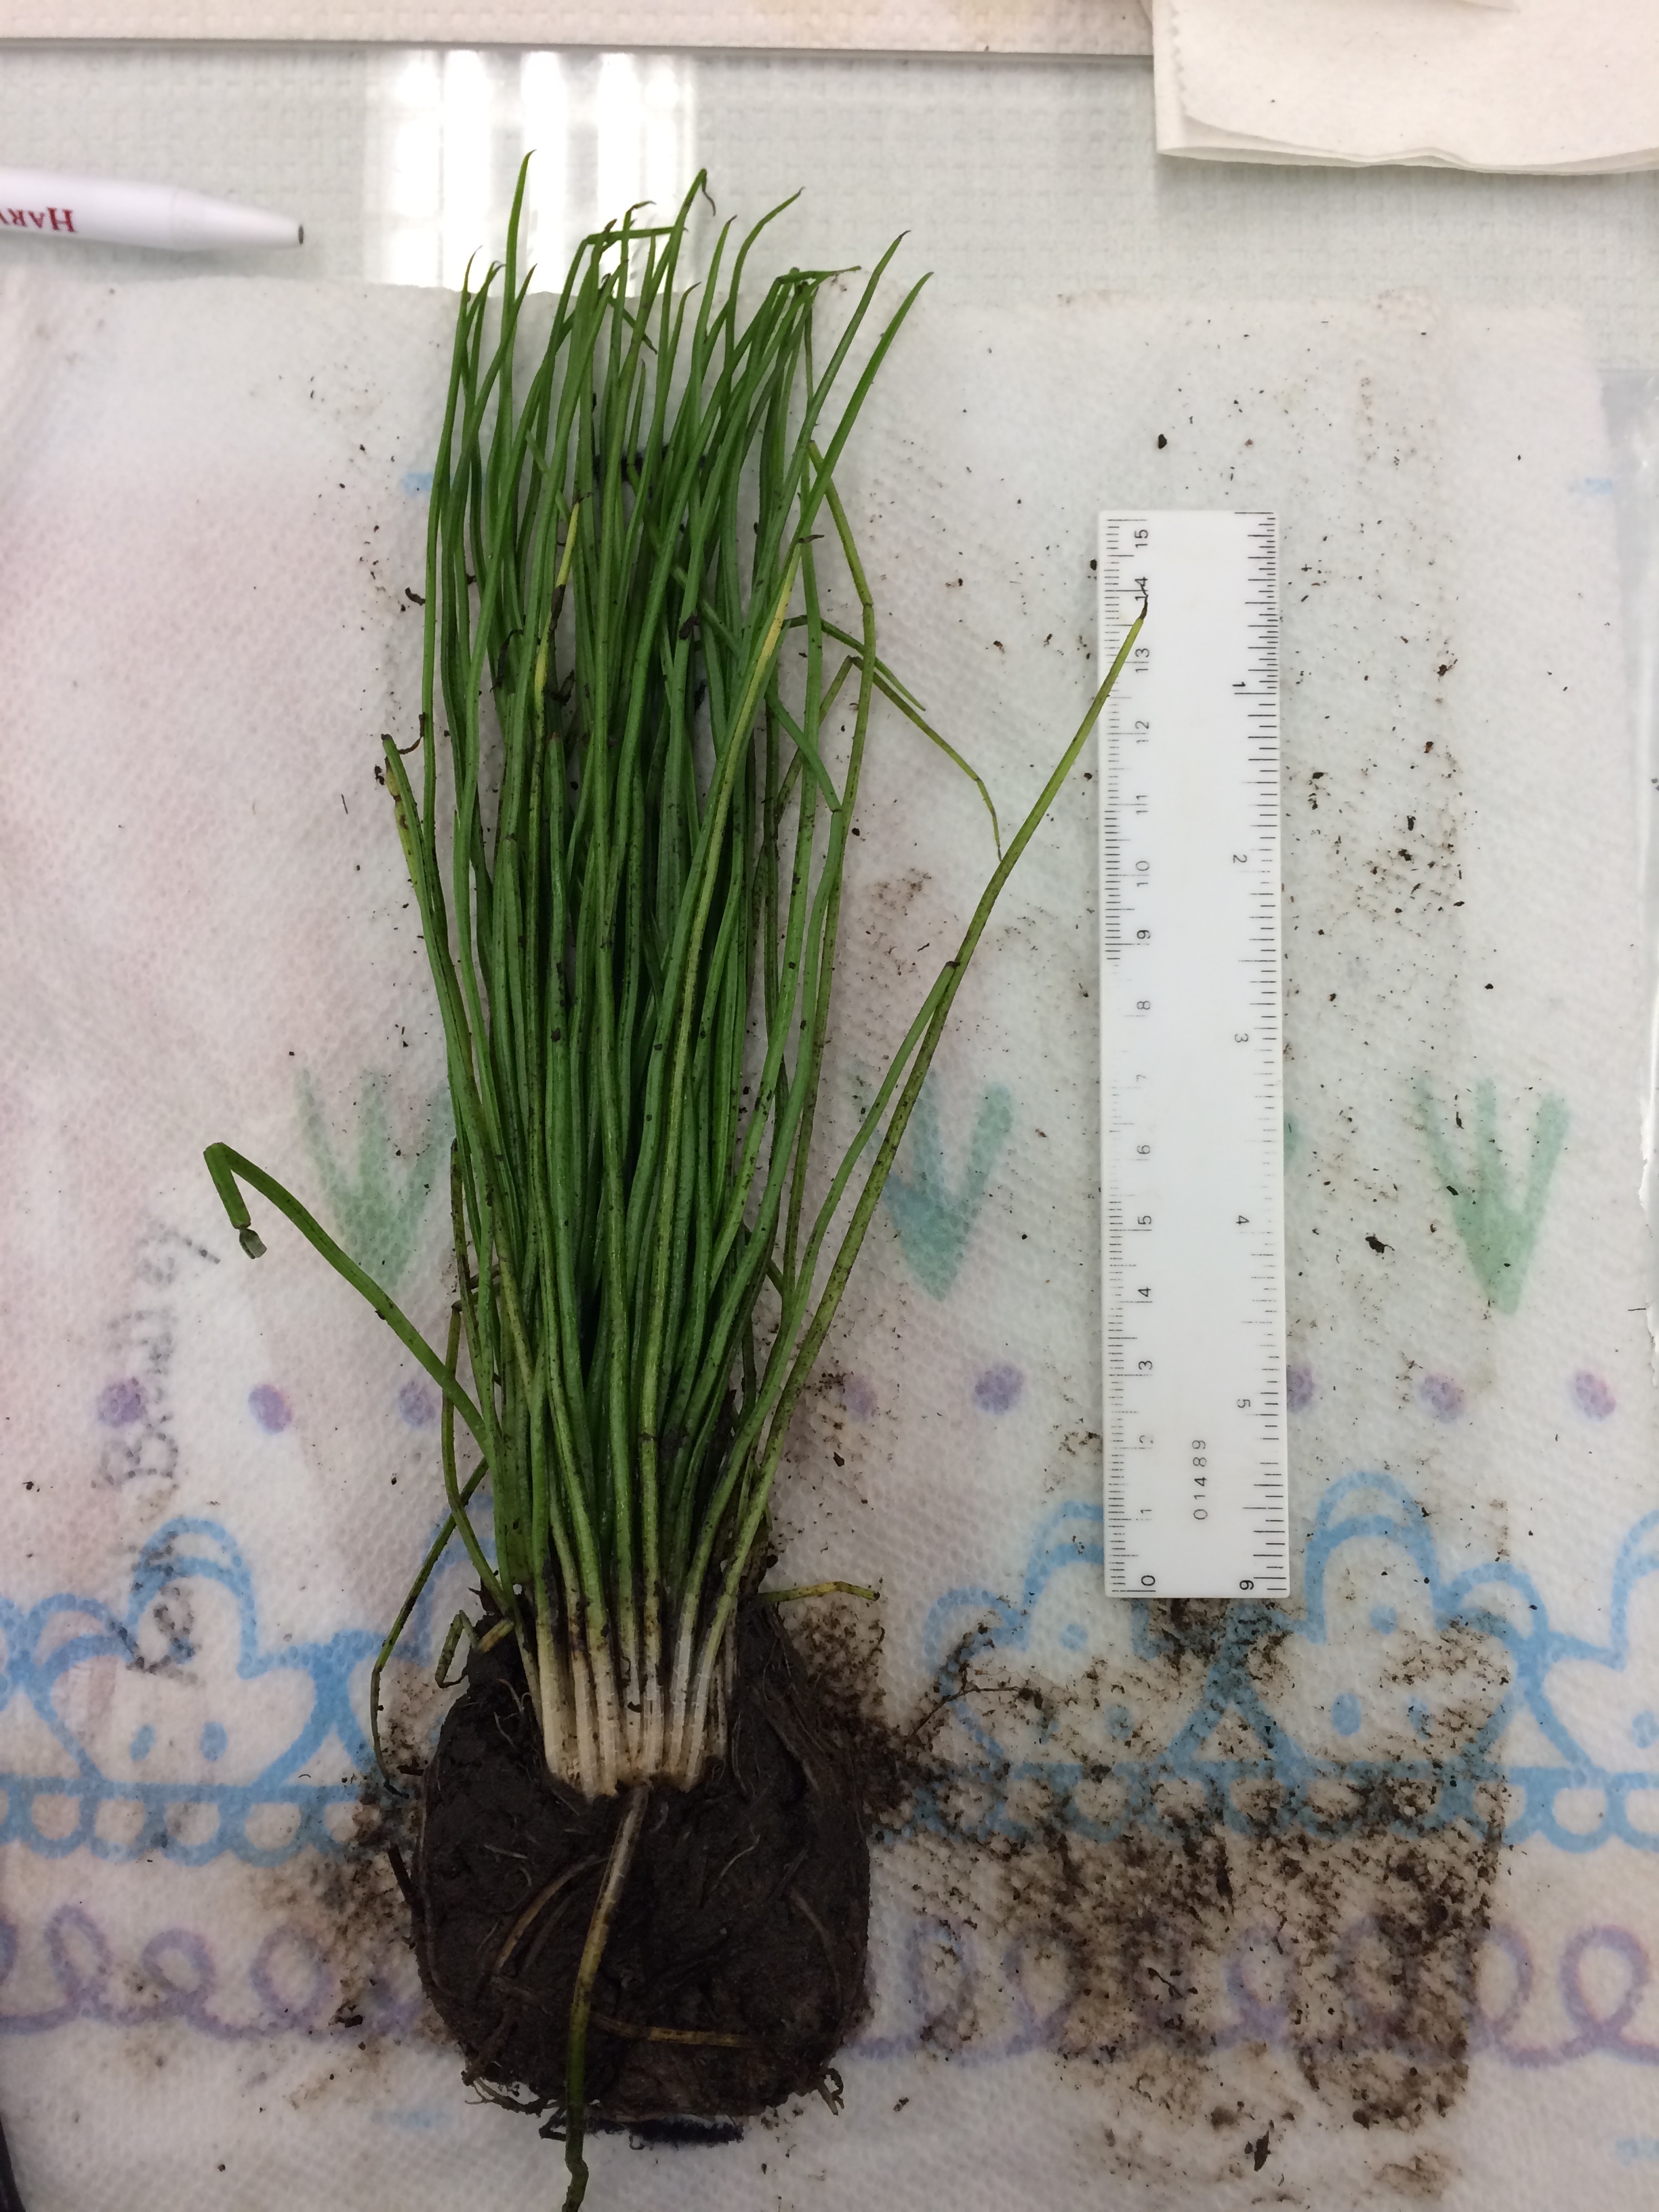
2. Collection
The underground part of a quillwort is the business end of the plant! The rootstock can be buried 6 inches deep or more, and it is critical to excavate the entire plant. Using a knife or small shovel, dig around the base of the plant about 1/2 inch away from the leaves. Do not dig out the soil -- keep it intact around the base of the plant! Using your fingers, feel through the soil to reach underneath the plant. If you feel the leaves, dig deeper. Once you can reach your hand all the way under the plant, gently pull it up with the soil intact around it.
Carefully peel the soil away from the base of the plant, keeping it as intact as possible.
To save material for DNA sequencing, clean healthy, young leaves and dessicate with silica gel. See full instructions here.
3. Examination
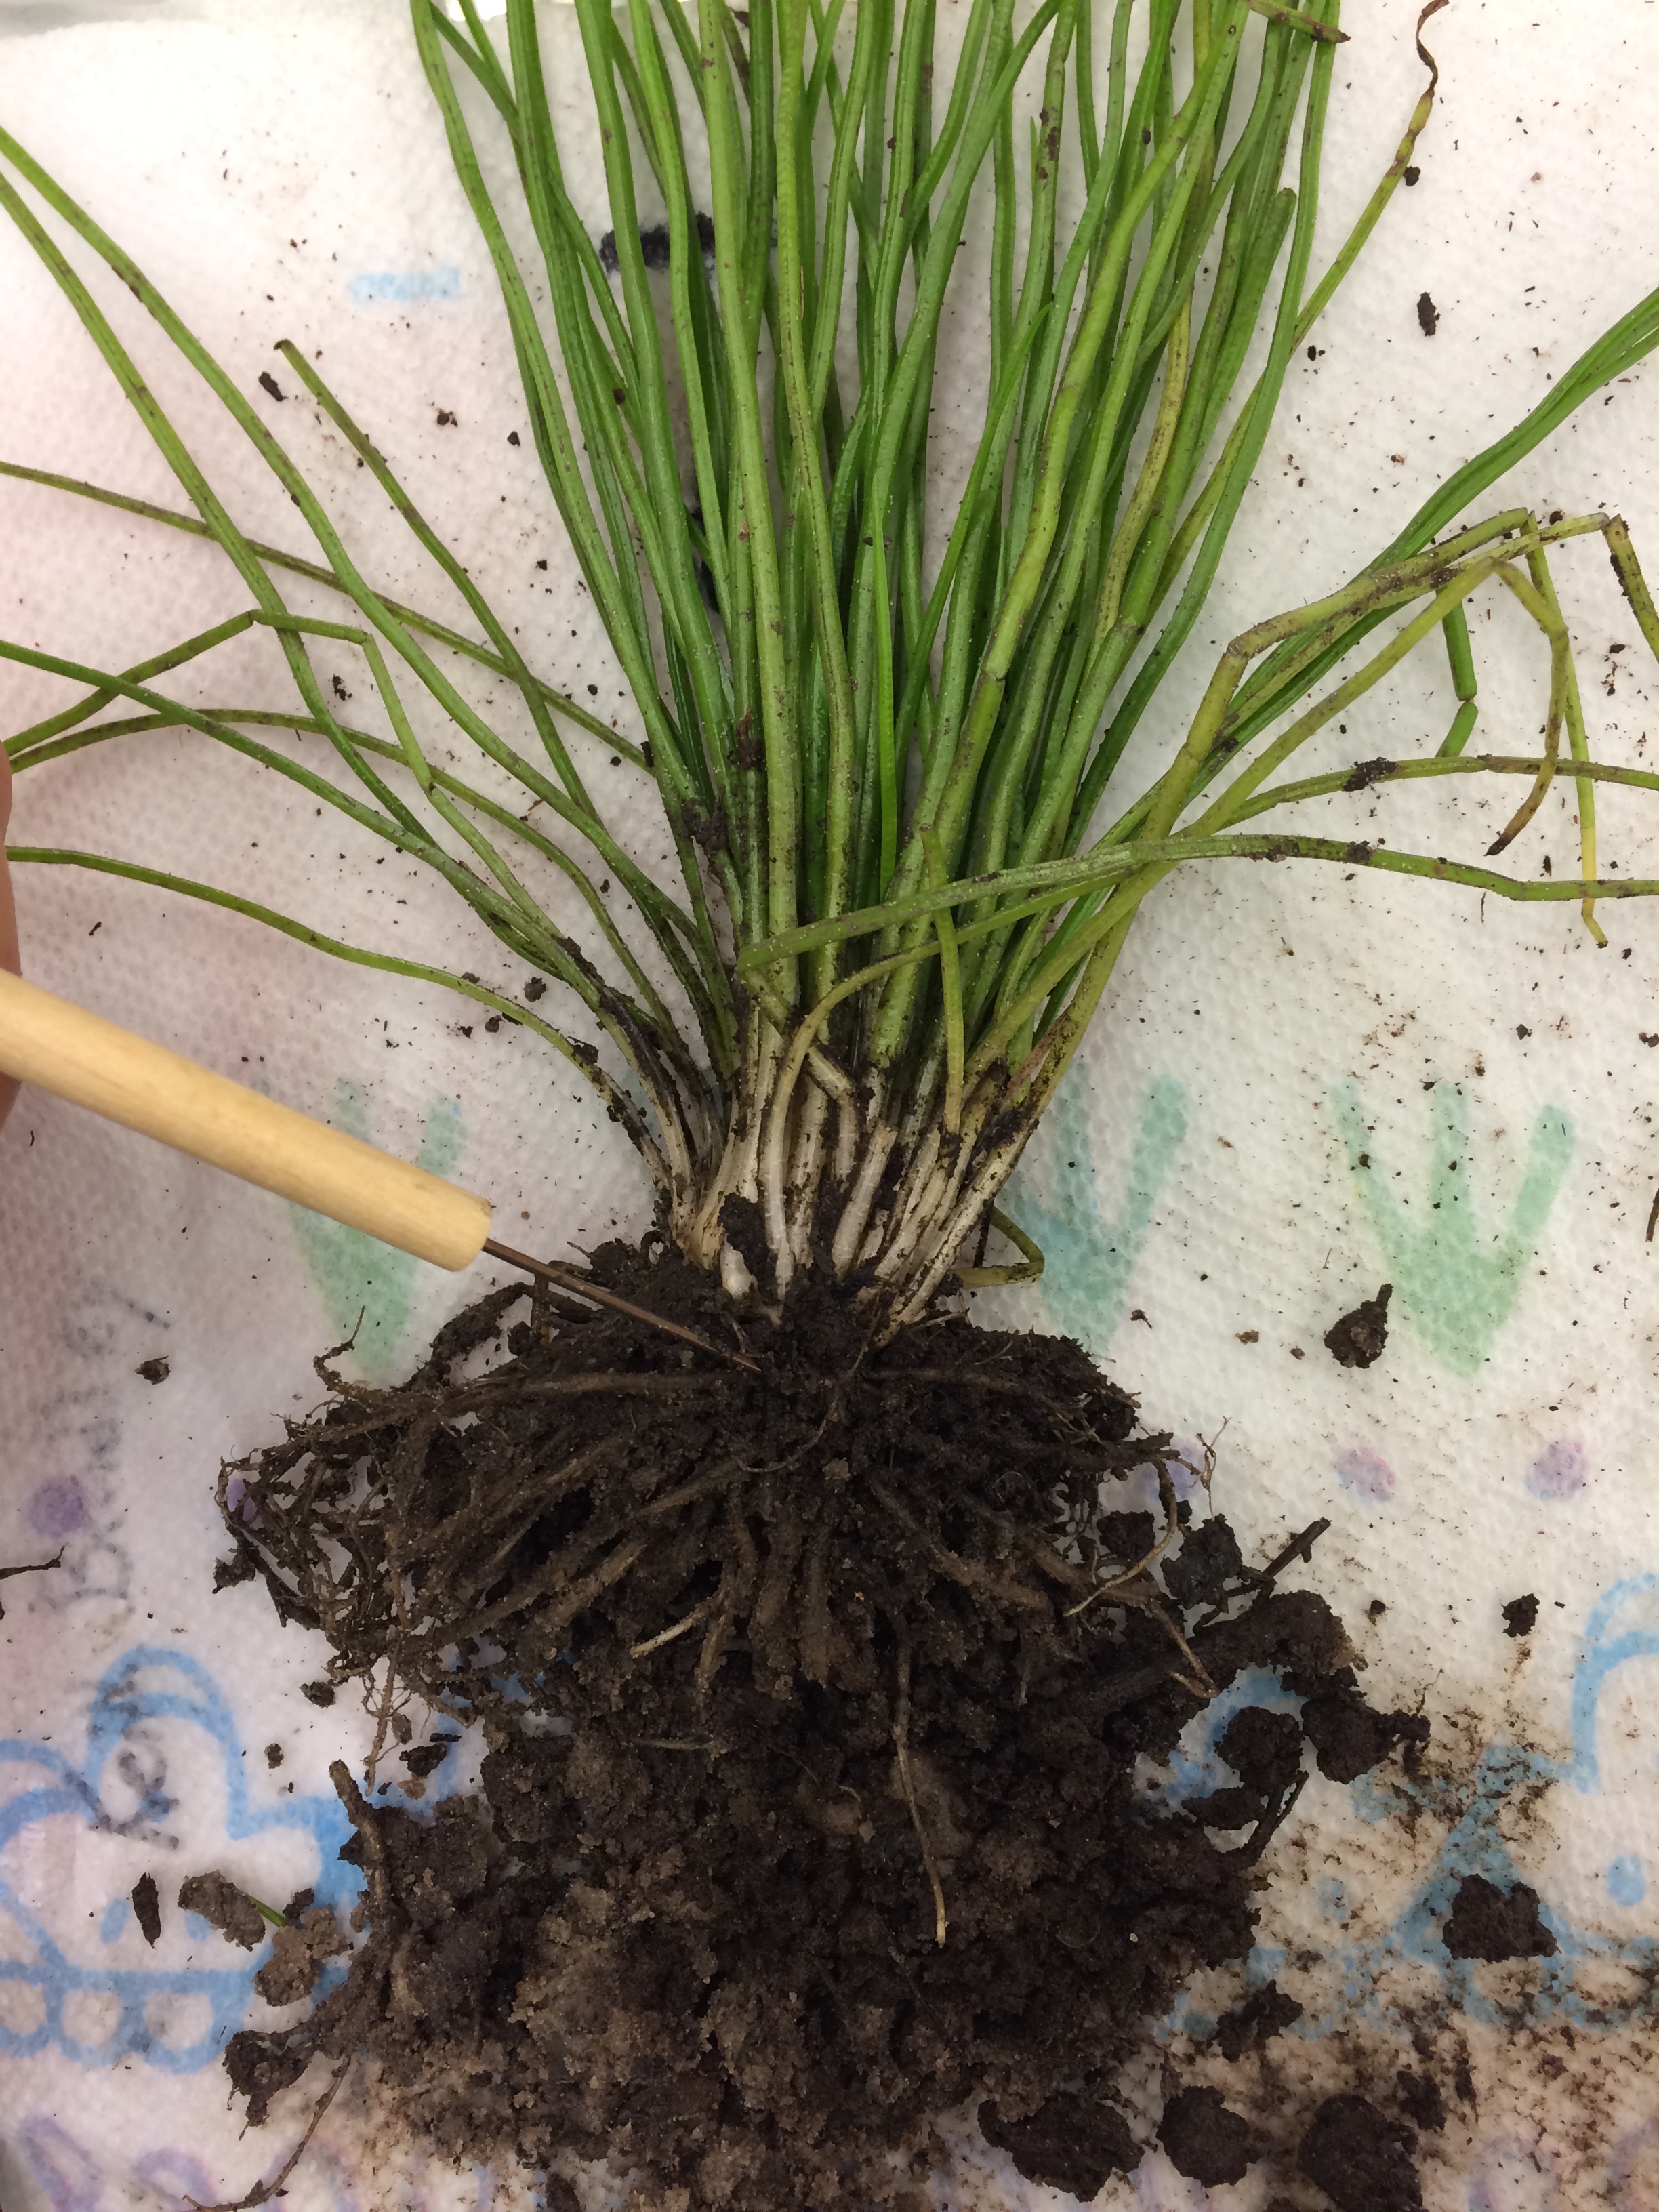
Begin measurements by recording the length of the plant (from rootstock to tip of the longest sporophyll), width of the plant at its rootstock, and shape of the rootstock. Count the number of living leaves. Calculate the average width of the leaves at midlength, and the proportion of the leaf that has alae. Also record the apical and basal shape of the alae, their width, and coloration.
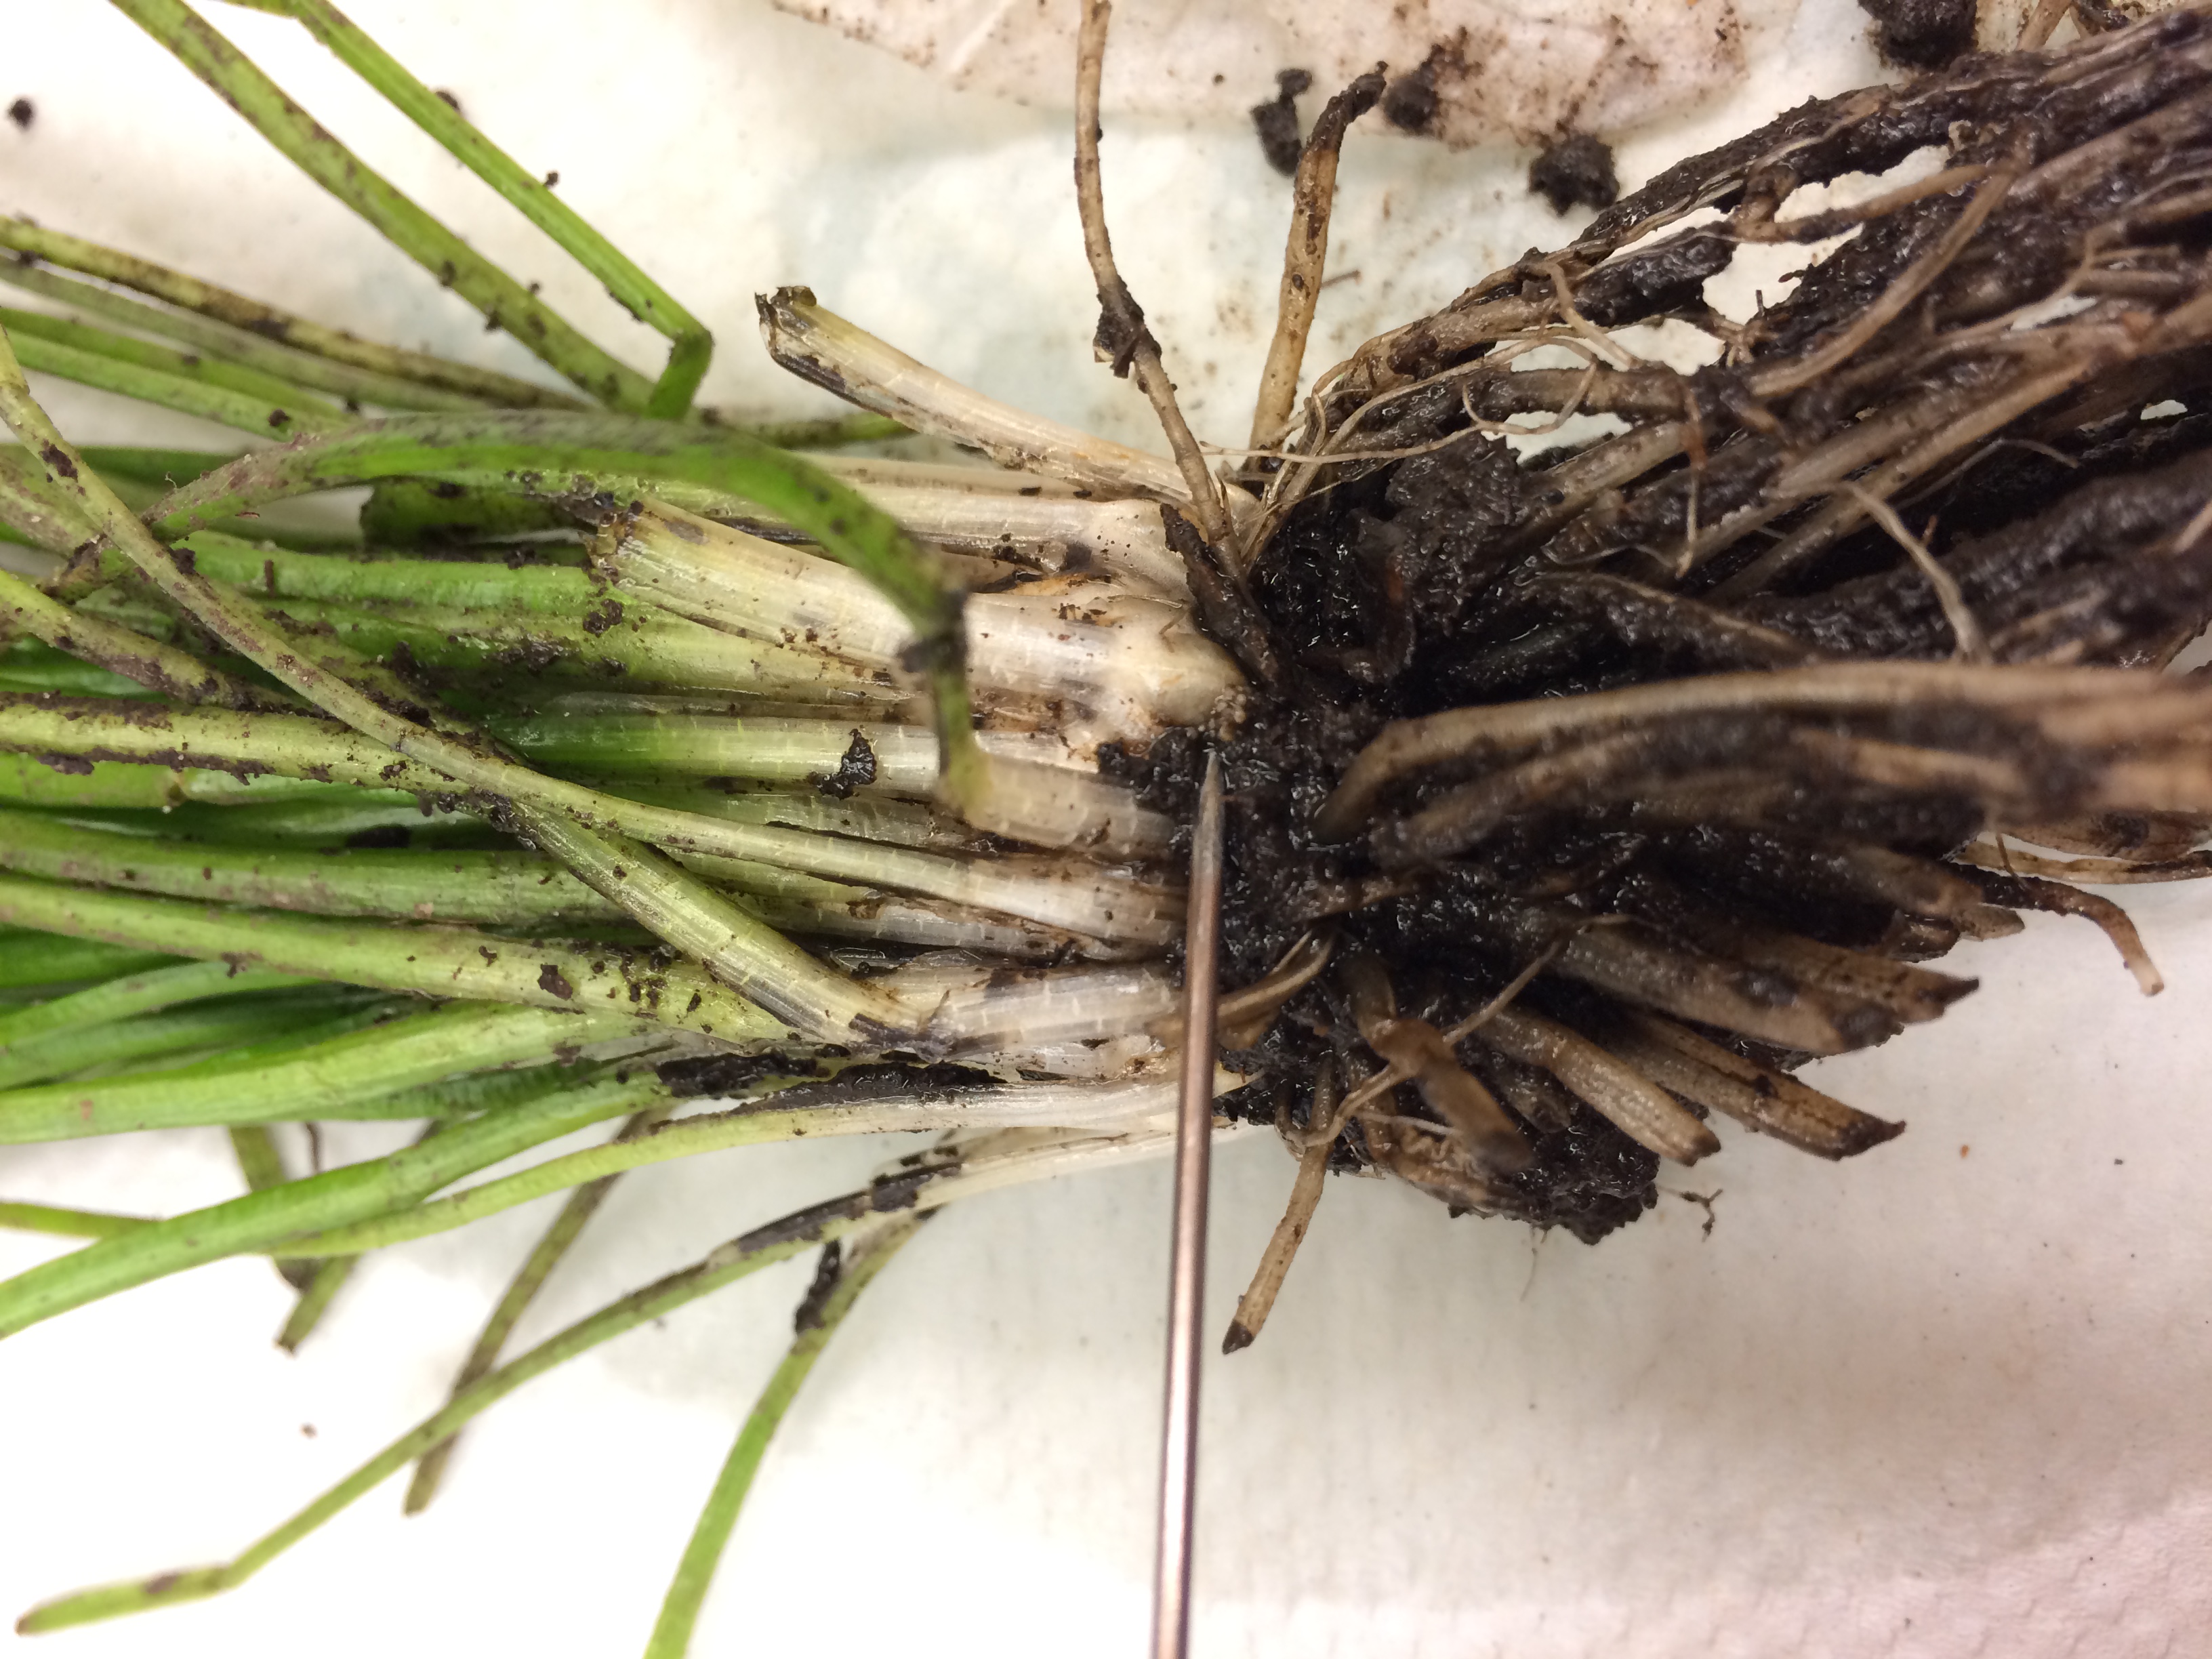
The base of your plant will give you most of the taxonomic features. If the base has a bulbous appearance, it is fertile. Where each leaf meets the rootstock that leaf may be widened, indicating the presence of a sporangium. Most quillworts produce separate whorls of megasporangia followed by microsporangia (some exceptions e.g. I. butleri), so megasporangia will be on the outer whorls of leaves, with microsporangia towards the center. Over time, the leaves bearing megaspores will fall off the plant and decompose, releasing their spores into the soil, followed by the microsporophylls.
3a. Plants with Intact Sporangia
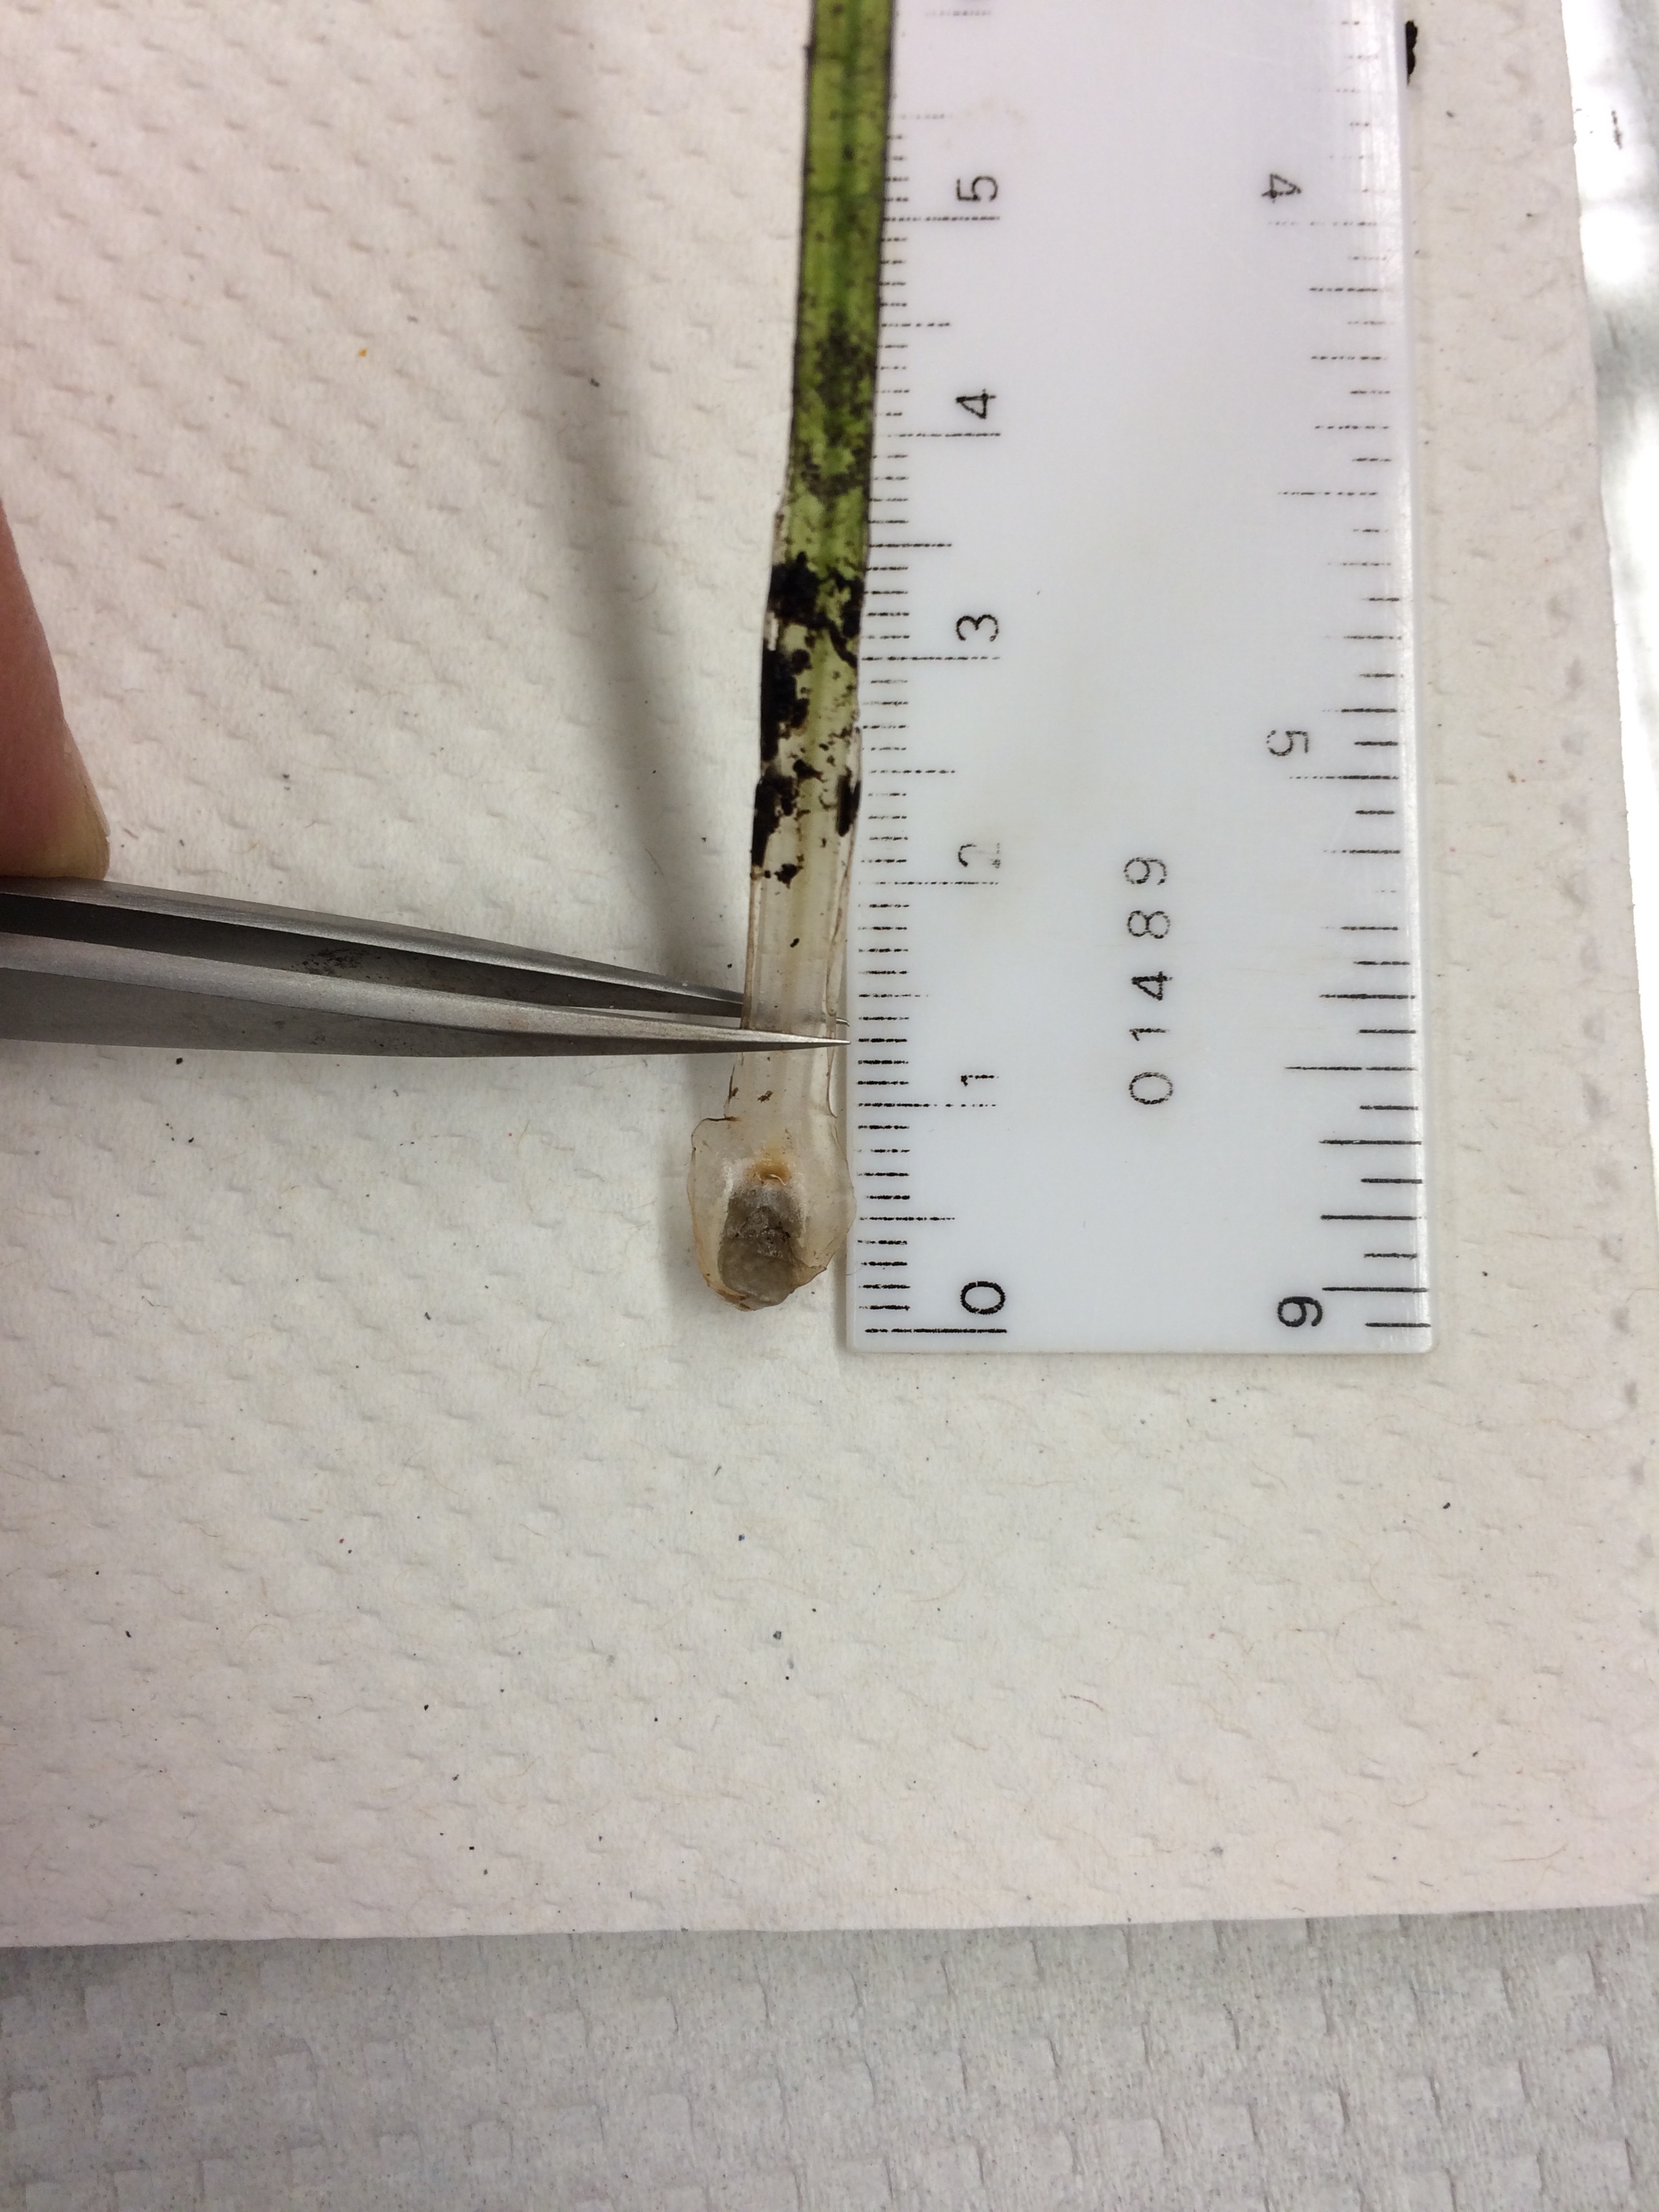
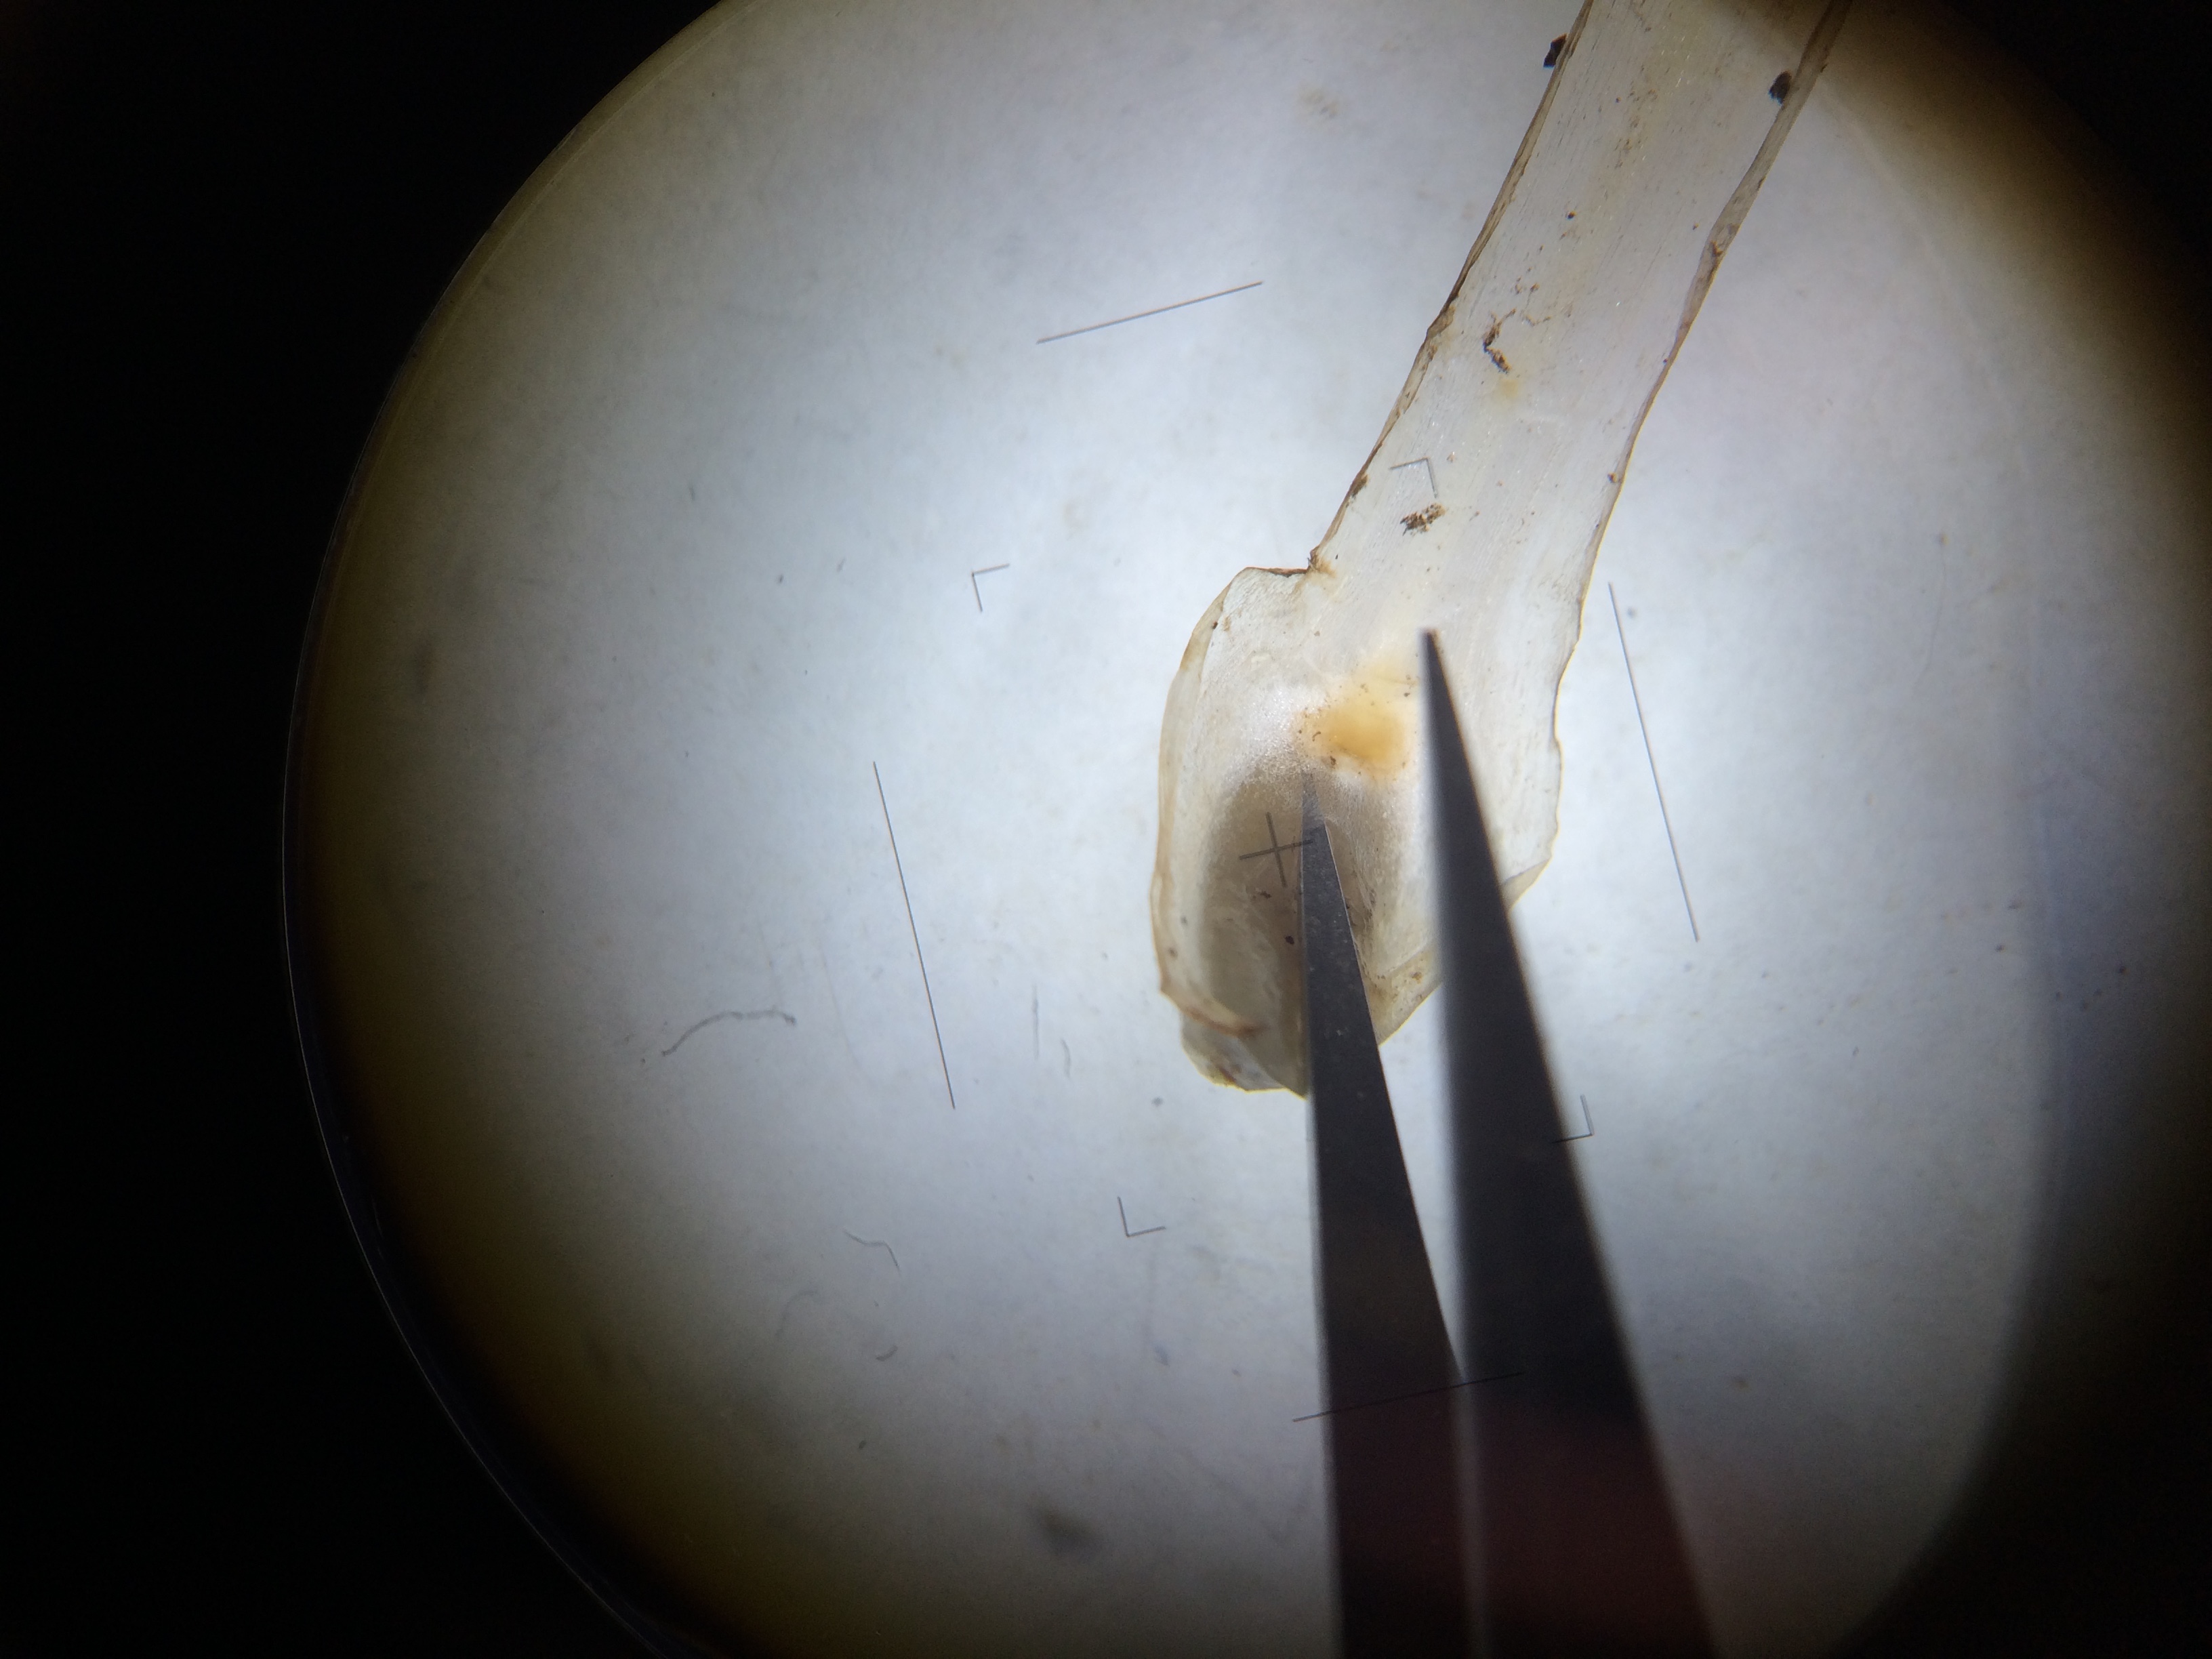
Fig. 5: Base of sporophylls with sporangia. Hover over images to highlight velum
Remove one of the outermost sporophylls, using forceps to get the entire leaf from the base of the sporangium. Note the coloration of the leaf bases and the wings (alae) around the sporangium. On the adaxial surface, measure the proportion of the sporangium that is covered by the velum, and dimensions of the sporangium, ligule, glossopodium, and labium, if present. Also note any coloration of the sporangium wall.
Select the most mature sporangia (i.e. closest to the outer whorl) and break mega- and microsporangia into small dishes of water. Swirl or agitate by hand to wash cellular debris from the spores' surfaces. Let spores air dry or in a heater at ~50-60 degrees C.
3b. Plants without Intact Sporangia
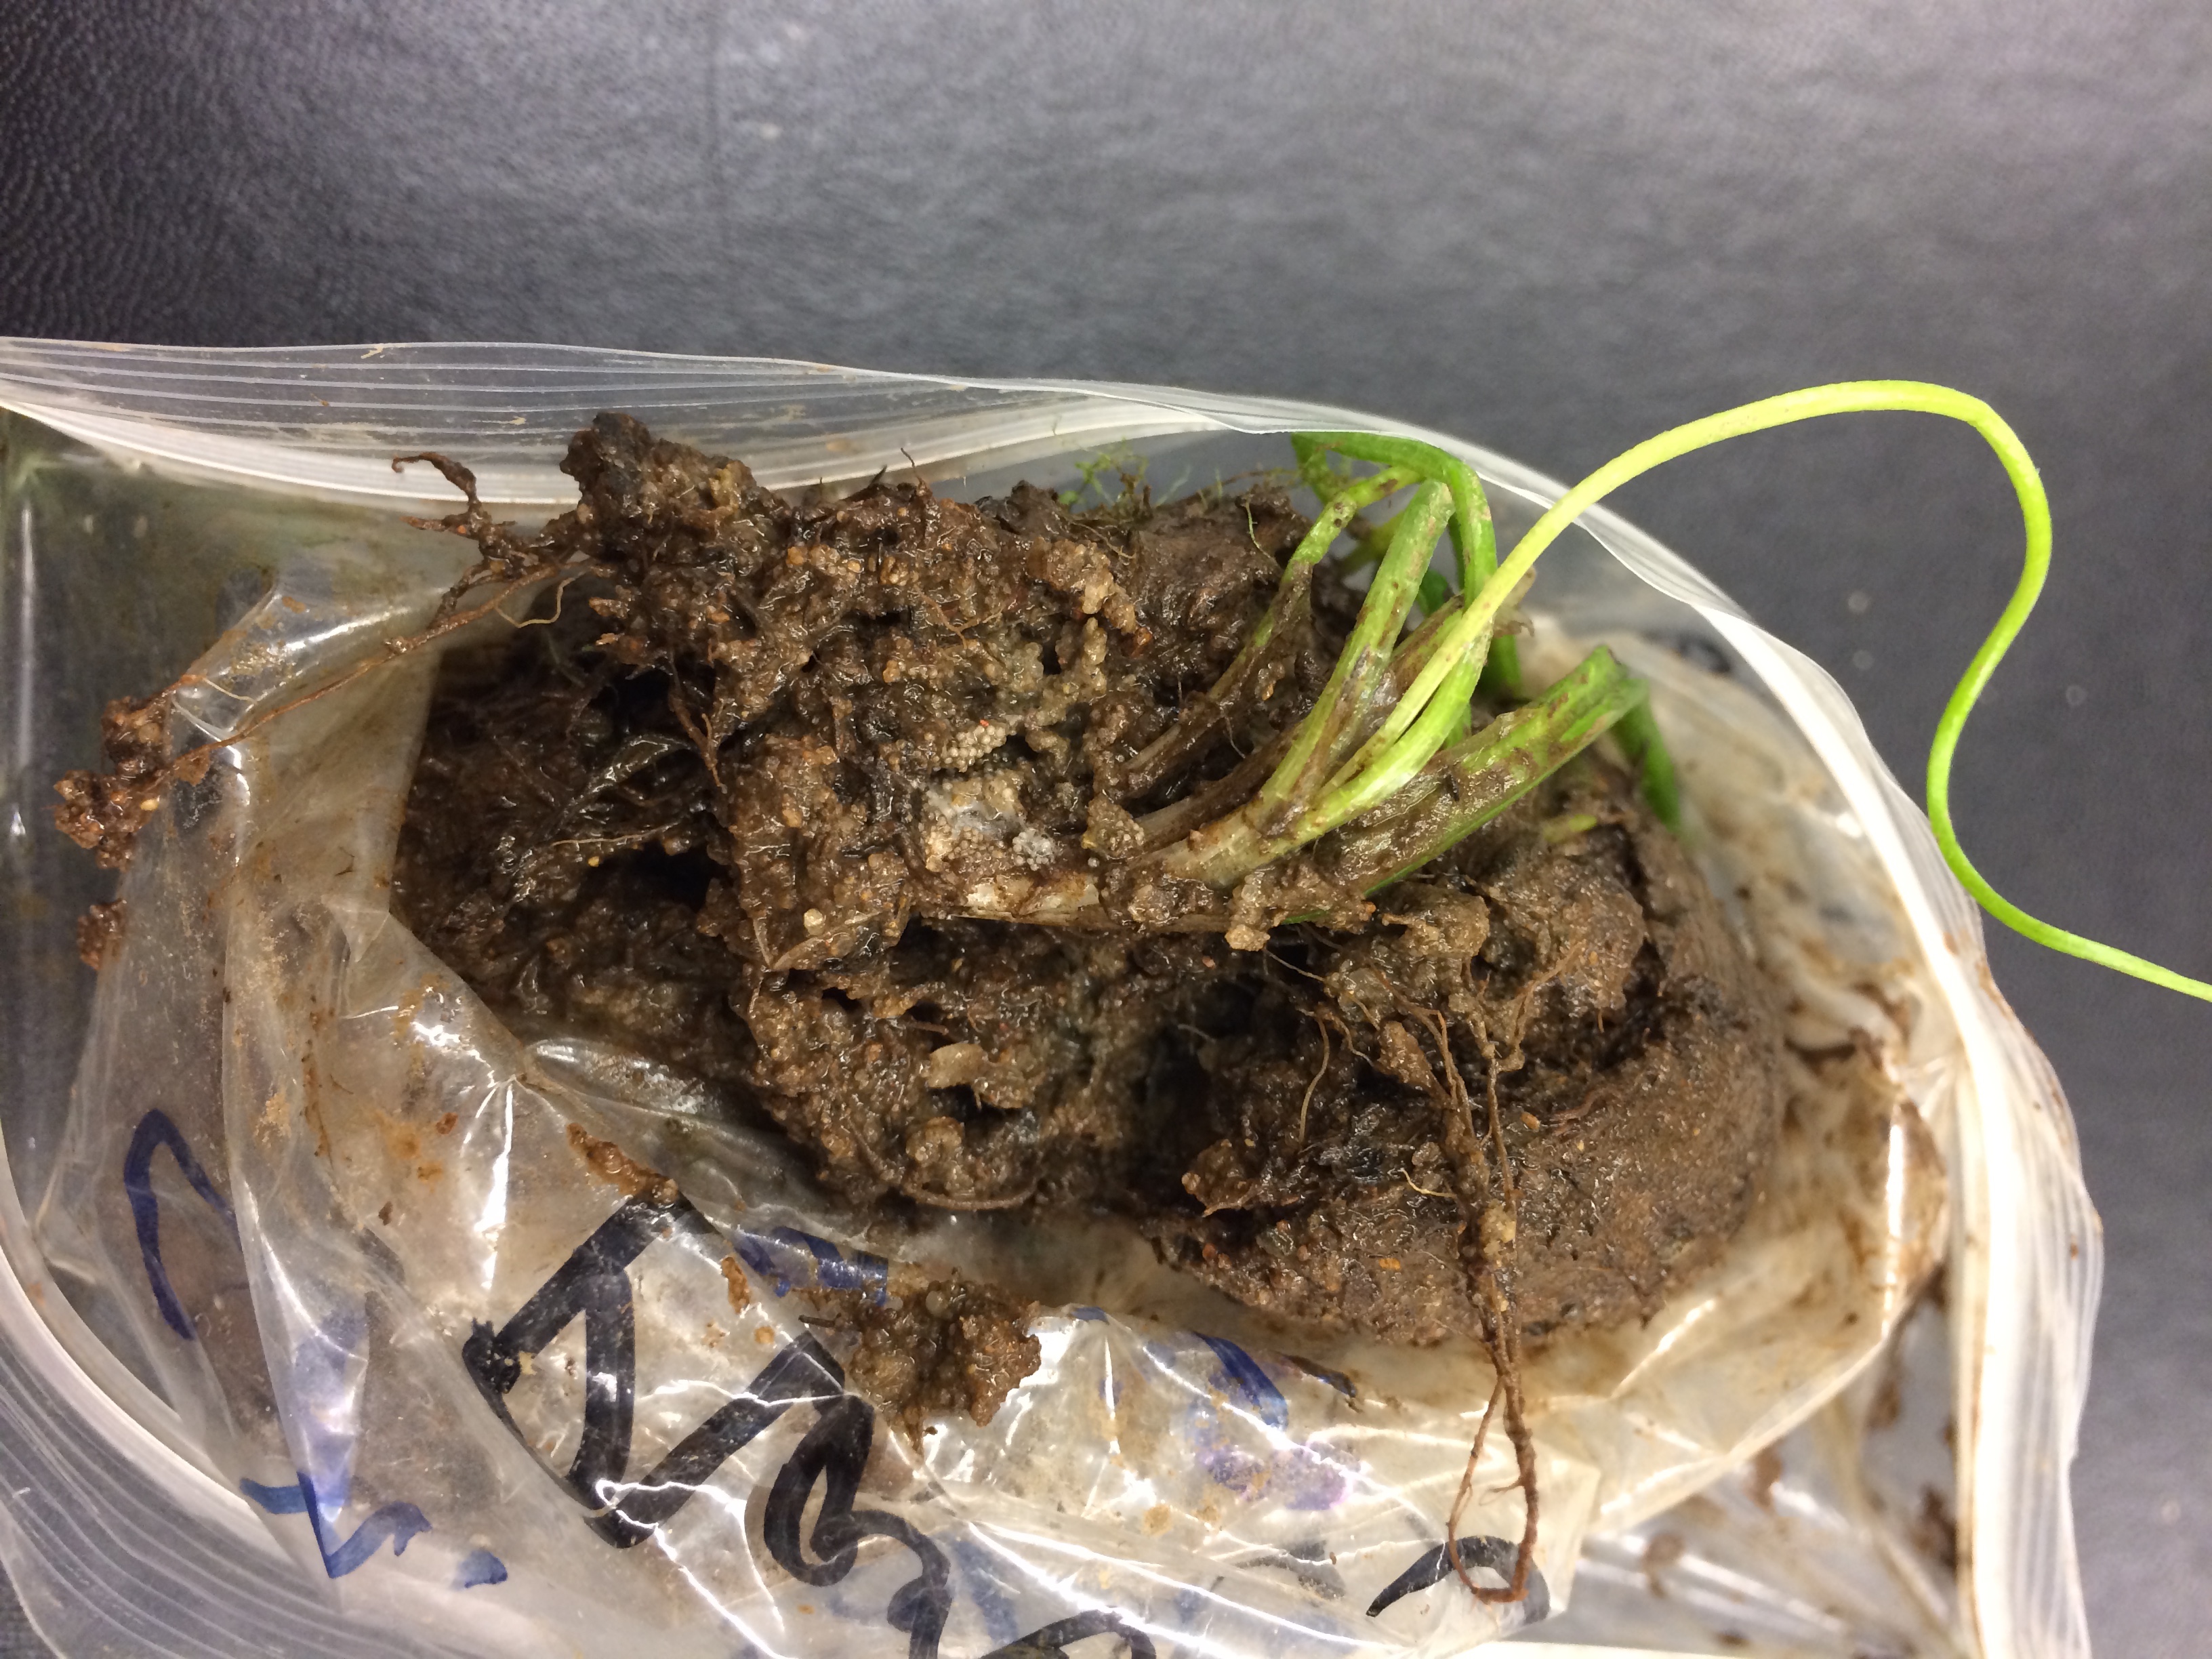
Fig. 6: Pale colored megaspores and microspores visible in soil at base of plant. Hover over image to zoom in
Search the soil adjacent to the base of the plant for spores. If the spores were recently released from the plant, pockets of spores can usually be seen around the base of the plant. Megaspores usually appear as round, uniform particles 0.25-0.75 mm in diameter (around the size of table salt grains) depending on the species, whitish but probably discolored by the soil. Likewise, pockets of microspores can be found if they were recently released, appearing as areas of fine soil with uniform size and color (varying from whitish to dark brown). Megaspores are best cleaned by rinsing, agitating, and transferring to successive dishes of water. Individual spores can be moved by touching (not grabbing!) with wet forceps or teasing needle. Due to their tiny size, microspores are impossible to separate from soil particles, so one wash in water is sufficient. Let spores air dry or with a heater at ~50-60 degrees C. Some megaspores benefit from cleaning by sonication, but test a sample first as the fine ornamentation of some species (I. echinospora, I. engelmannii, I. valida, etc.) will be damaged.

Fig. 7: Washing spores with squirt bottle
If you can't see any megaspores in the soil, it is still possible to find some by sieving the soil through successive 500 um and 100 um screens. Large organic material and some large megaspores will be caught in the 500 um screen, while megaspores of most species will be caught in the 100 um screen. Spread the soil from the screens in a thin layer to dry, then search for megaspores under a dissecting scope. Transfer spores by touching (again, not grabbing!) with wet forceps or teasing needle and clean as above.
Once megaspores are cleaned and dried, they can be examined with a dissecting microscope (50-60X magnification is ideal). At this magnification, features of the ornamentation (also referred to as macroornamentation) are apparent. Note the ornamentation type of the proximal (with trilete ridges) and distal (without trilete ridges) surfaces, whether an unornamented girdle distal to the equitorial ridge is apparent or not, size and shape of the trilete/equitorial ridges, and whether the trilete/equitorial ridges themselves have any ornamentation.
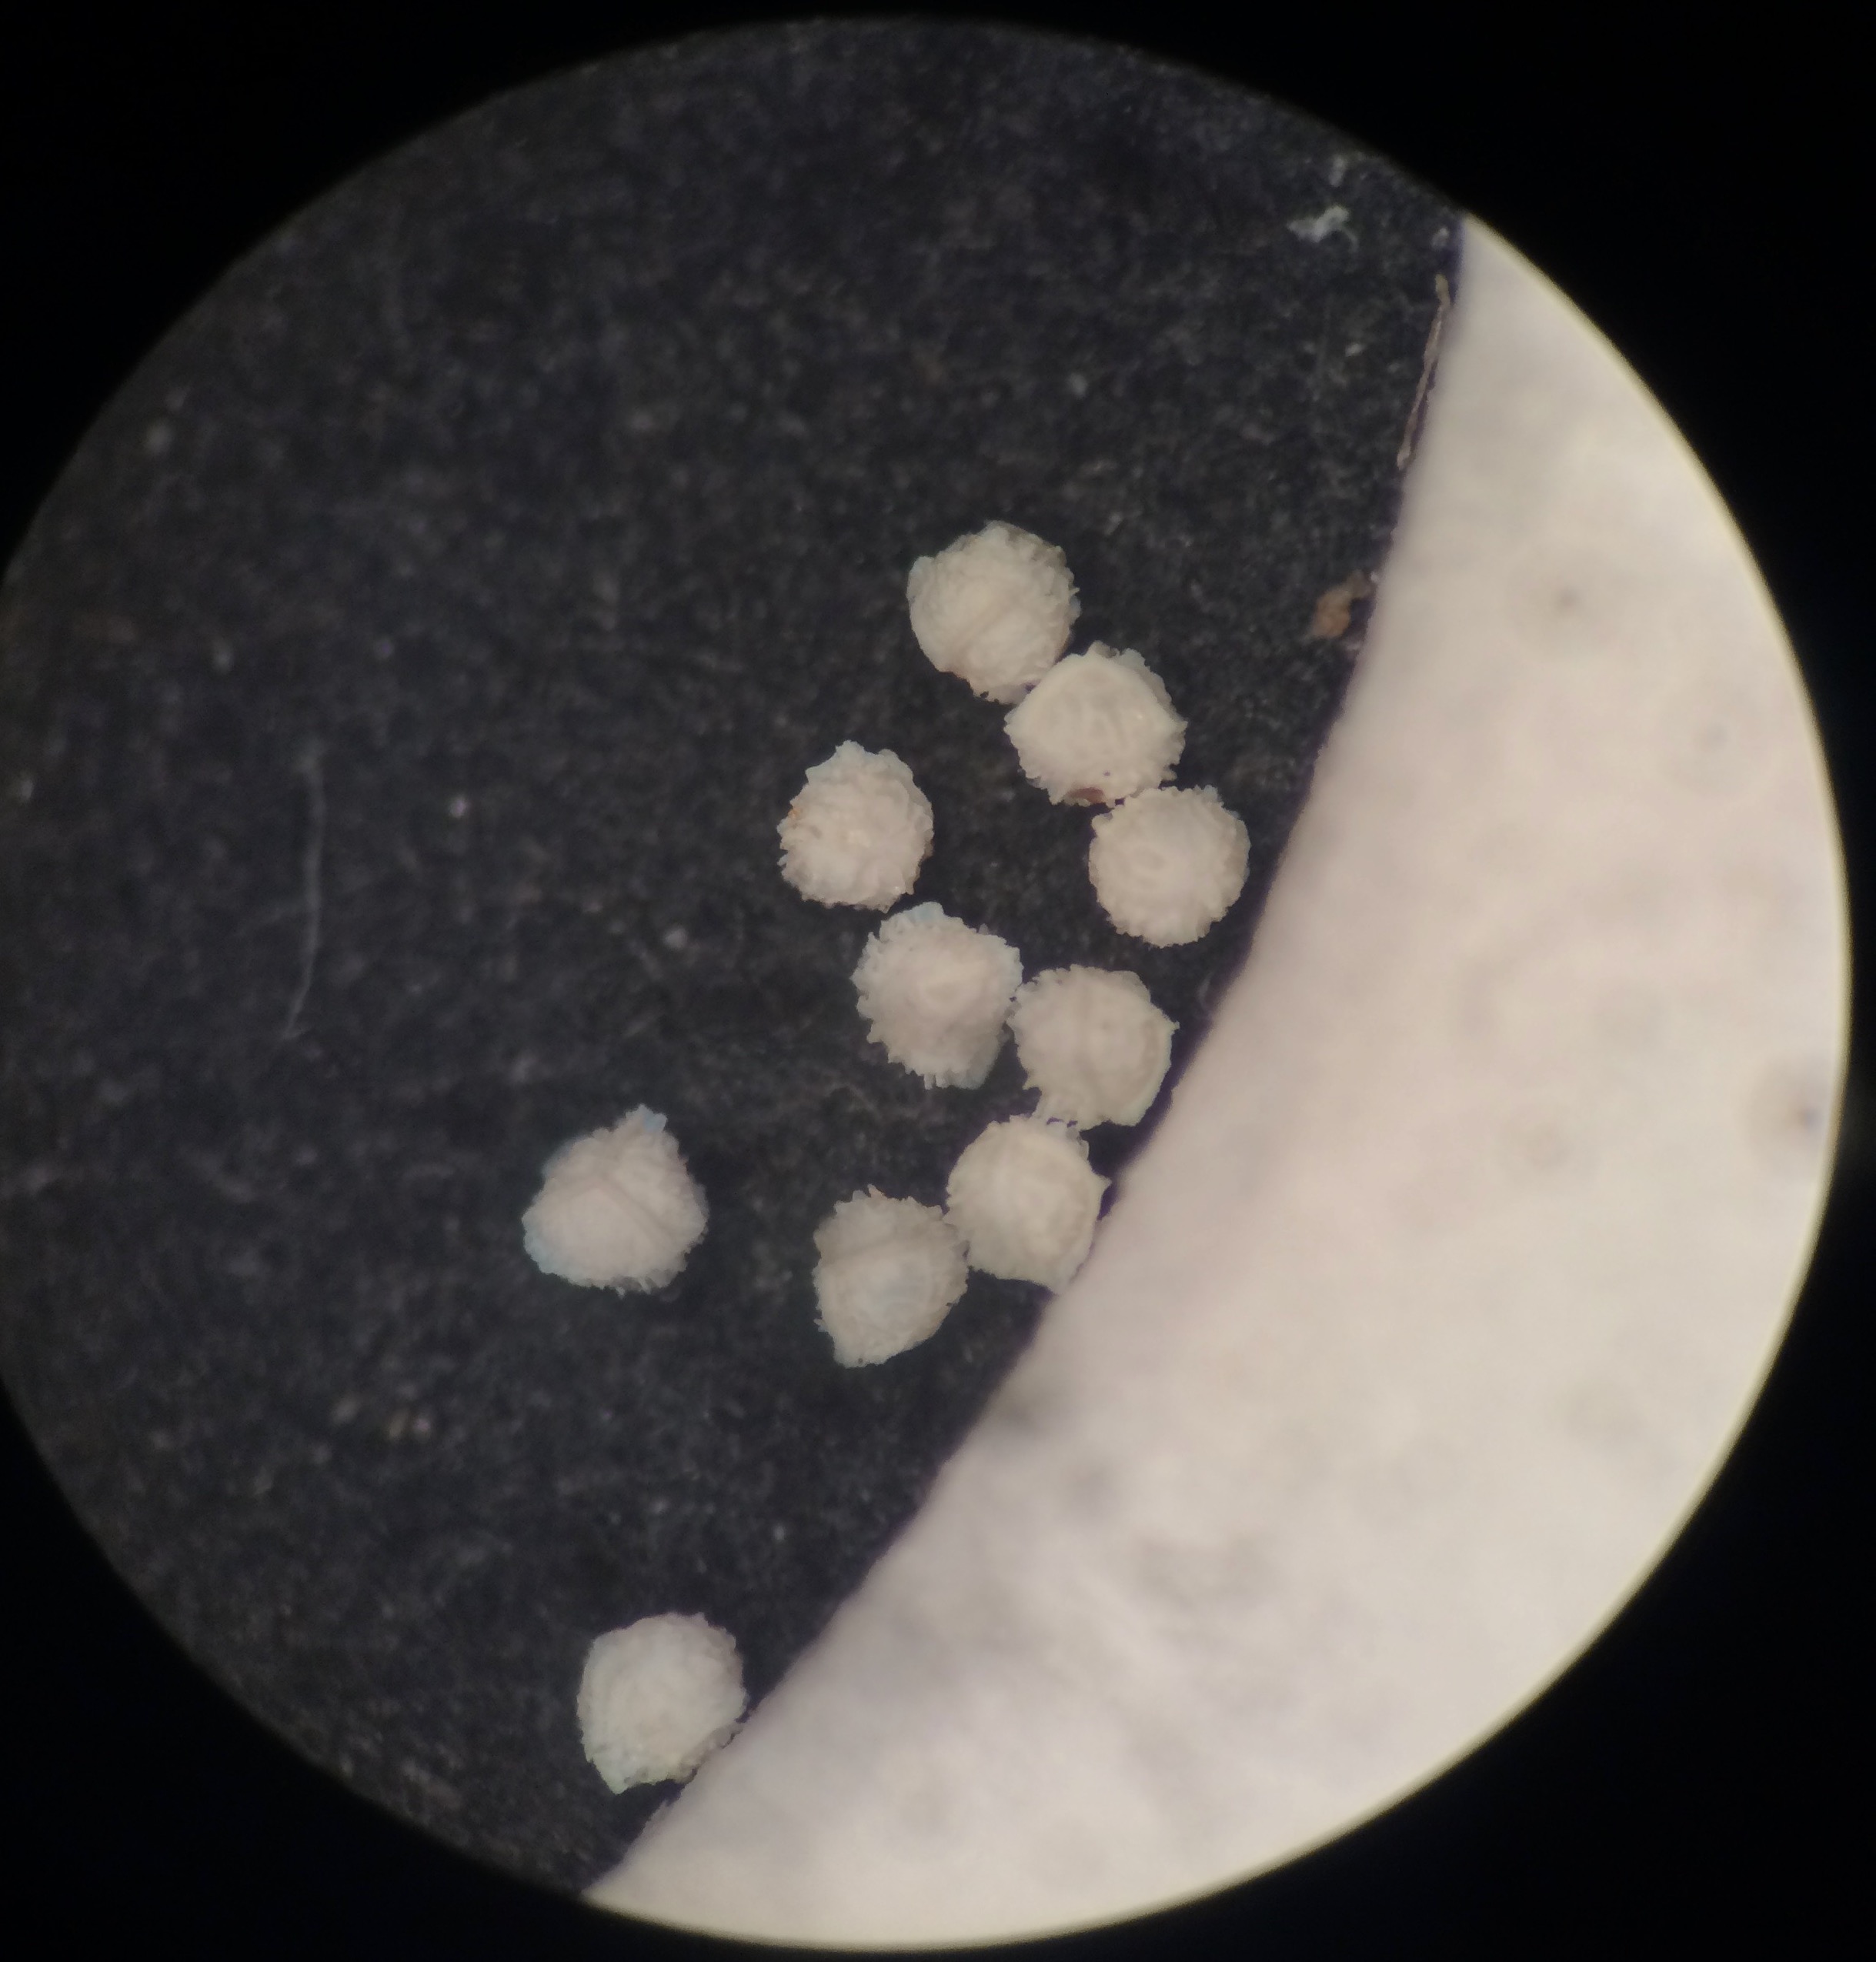
Fig. 8: Megaspores seen through dissecting scope
Except color, usually reported as color of the dry aggregation of microspores, features of the microspores can't be adequately seen without an electron microscope.
4. Cytology
The number of chromosomes in a quillwort, or its ploidy level, is an important characteristic used to tell apart species. Unfortunately, this is difficult to measure. Direct counting of the chromosomes is possible by squashing and staining growing root tips, then finding cells under a compound microscope that are going through mitosis (see methods in Heafner and Bray 2004, Pereira et al. 2015). While not as accurate as chromosome counts, genome size (Bolin et al. 2018) and spore size (Pereira et al. 2015) positively correlate with chromosome number and can be used for rough estimates of ploidy level.
| Ploidy Level | Chromosome Number (n=11) | Genome Size (1C-Value) | Megaspore Diameter (um) | Microspore Diameter (um) |
|---|---|---|---|---|
| Diploid | 22 (2n) | 1.2 - 3.2 | N. America: 200-450 S. America: 500-650 |
N. America: S. America: 25-30 |
| Tetraploid | 44 (4n) | 2.7 - 4.9 | N. America: 450-625 S. America: 600-850 |
N. America: S. America: 29-38 |
| Hexaploid | 66 (6n) | 3.8 - 9.3 | 420-880 | 22-42 |
| Octoploid | 88 (8n) | 7.4 | 753 | 36 |
| Decaploid | 10 (10n) | 12.0 - 12.9 | 700-800 | |
| Dodecaploid | 12 (12n) | Unknown |
5. Keying
With all the characters above identified, it should be possible to use most identification keys. Some for the US and Canada include the Flora of North America treatment by Taylor et al. (1993) and the Key to Southeastern Quillworts by Brunton (2015).